
4 min reading time
How to Compress your eLearning Videos

If you use video in your eLearning courses it’s likely you’ve run into a very common problem. Videos files are typically large and bulky resulting in slow upload and download times, not to mention full hard drives. However, there are some simple tactics you can use to reduce the size of your video files. This post identifies what you need to look out for when compressing videos and the tools you can use.
Why reduce the file size of a video?
Storing and managing large video files becomes problematic very quickly. You can resolve this by reducing the file size during video production or by using compression techniques after post-production. There are three reasons for you to compress your videos. Large files typically:
- Take up more space
- Take longer to upload
- Take longer to download
Factors that affect a video’s file size
There are various elements that dictate video file sizes. Knowing these makes it easy to identify why your videos are so bulky, and also helps you understand how you can make file size reductions.
- Length
- Resolution (Standard Definition / High Definition / 4k)
- Frame Rate
- Color Depth
- Movement
- Sound Quality
Providing training videos in the highest possible resolution should be balanced with the practicalities of doing so. The standards set by television and movie producers don’t have to be used to produce a great quality video. 1280 x 720 – also known as 720p is perfect for most instructional videos. Choosing a lower resolution results in much smaller file sizes. If your video requires more detail then increase the resolution accordingly.
For example, if you have a large amount of detail on a page you might need a higher resolution to ensure those details are clear. To see how changing a video’s resolution impacts it’s quality open a video on YouTube and click on the cog symbol in the bottom right-hand corner of the player. Select your preferred screen resolution to see for yourself the difference in quality. The jump from 1080p to 720p isn’t so large as to hinder the video quality, particularly when it’s viewed on mobile or tablet devices.
If you’re publishing video content using a video tool such as Adobe Premiere Pro or Camtasia you should export the video at 720p. Keep the original files just in case you want to increase the resolution at a later stage.
Why compress your videos?
As a rule of thumb: 1 hour of uncompressed 1080i video at 60 frames per second takes up about 400GB. That’s a lot. A compressed file with the same specifications will be roughly 200MB in size. Let’s look at the practical implications of managing large video files:
- They are more difficult to store. Large external hard drives are one solution, but they only address the symptom rather than providing a cure.
- Large files take a long time to upload. If you are adding video to a SCORM course, for example, a large file will increase the time it takes to create your course. This eats into your productivity, especially if you have to upload multiple videos. A lighter video file will upload quicker. And the time to compress a video is much quicker than uploading the original file.
- They’ll take longer to render and play for the viewer. 4k video is great, just not when you’re viewing is via a mobile network.
You need to strike a balance between reducing the file size so the videos can be easily distributed and consumed – without negatively impacting the viewing experience for your learner.
What is video compression?
Video compression is an algorithmic process that reduces the number of bytes found in the video. In short, it reduces the file size of the video. It’s slightly more complicated than image compression as you’re compressing the video’s image, audio, and formatting elements. When you’re using a compression tool there are specific terms to choose from. To help you understand these here’s a brief explanation of the most important ones. There are different methods for compressing video called codecs (compressor-decompressor). A codec encodes and decodes a video. The encoder compresses the video and the decoder decompresses it. The most common codec used is H.264 or MPEG-4 Part 10. This video is placed within a container – the most commonly known being mp4. You really can’t go wrong with an H.264 codec and an mp4 container.
Lossless versus Lossy video compression
Video compression has two distinct characteristics – Lossless and Lossy. Lossless is a form of compression where the original file can be reconstructed from the compressed file – all the file data is still in place. Lossy compression alters the file data. This prevents you from reconstructing the original file. As you’d expect, Lossy compression reduces the file size more.
Using HandBrake to compress a video
As with all types of compression, there is a relationship between file size and the quality of the video. The key is getting a balance between these elements is to ensure that you’re not sacrificing too much quality. Adjust the settings in the compression tool you’re using to balance between file size and quality. There are a number of tools available that make it quick and easy to compress video. Despite a very utilitarian user interface, HandBrake works really well. The best part about this tool is that the default settings are suitable for most videos. 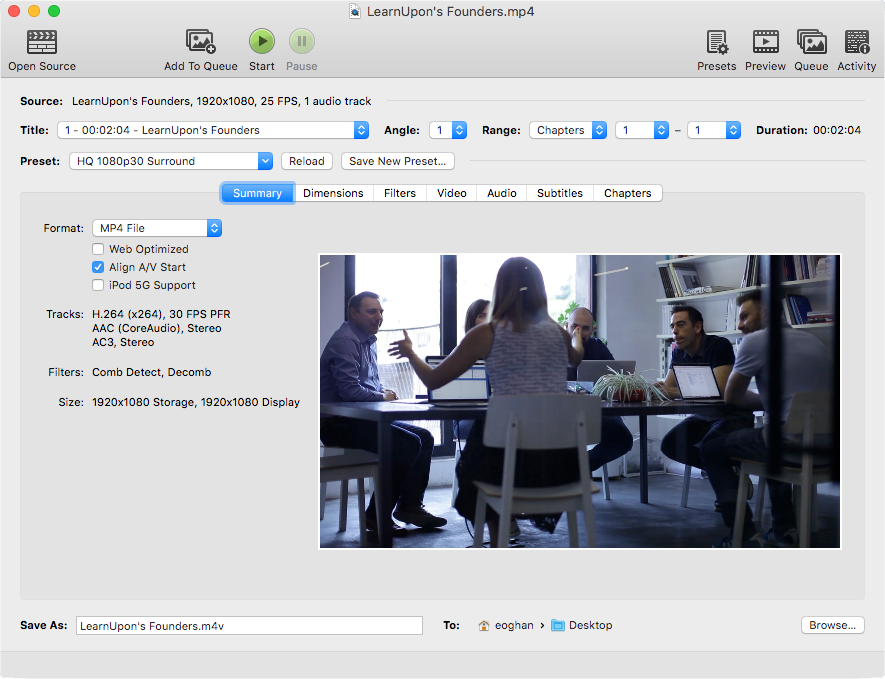 To compress a video follow these simple steps:
- Upload your video
- Choose a preset from the drop down
- Choose a format: We suggest you choose MP4
- Select a video encoder: H.264 is the most commonly used
- Match your frame rate to the frame rate used in your source file
- Click start
After a few minutes, your newly compressed video will be ready for you to start using. We recommend you store original, non-compressed copies of your videos on an external hard drive in case you need to use them again at a later stage. By following these steps to compress your videos you can reduce the overall file size making them much easier to manage for both you and your learners. Any Video, Freemake, and Video Converter Factory are other compression tools that you may want to test out so you can find the one that works best for you.