
4 min reading time
Publishing A SCORM Course with Articulate Storyline 3

In this step-by-step guide, we’ll show you how to publish SCORM content in Articulate Storyline so you can upload it to an LMS like LearnUpon. We’ll highlight the best settings to choose when publishing SCORM courses. We’re going to focus on SCORM 1.2 as it’s the version of SCORM that LearnUpon supports. We also support another eLearning standard called xAPI, which might be a better option to choose. When you have finished creating your course and you’re happy with what you see when you preview – the next step is the publishing process. (We used storyline 3 for this guide, but the process is pretty much the same for Storyline 2.)
Step 1: Name File and Decide Location
Click the “Publish” button from the Storyline ribbon. 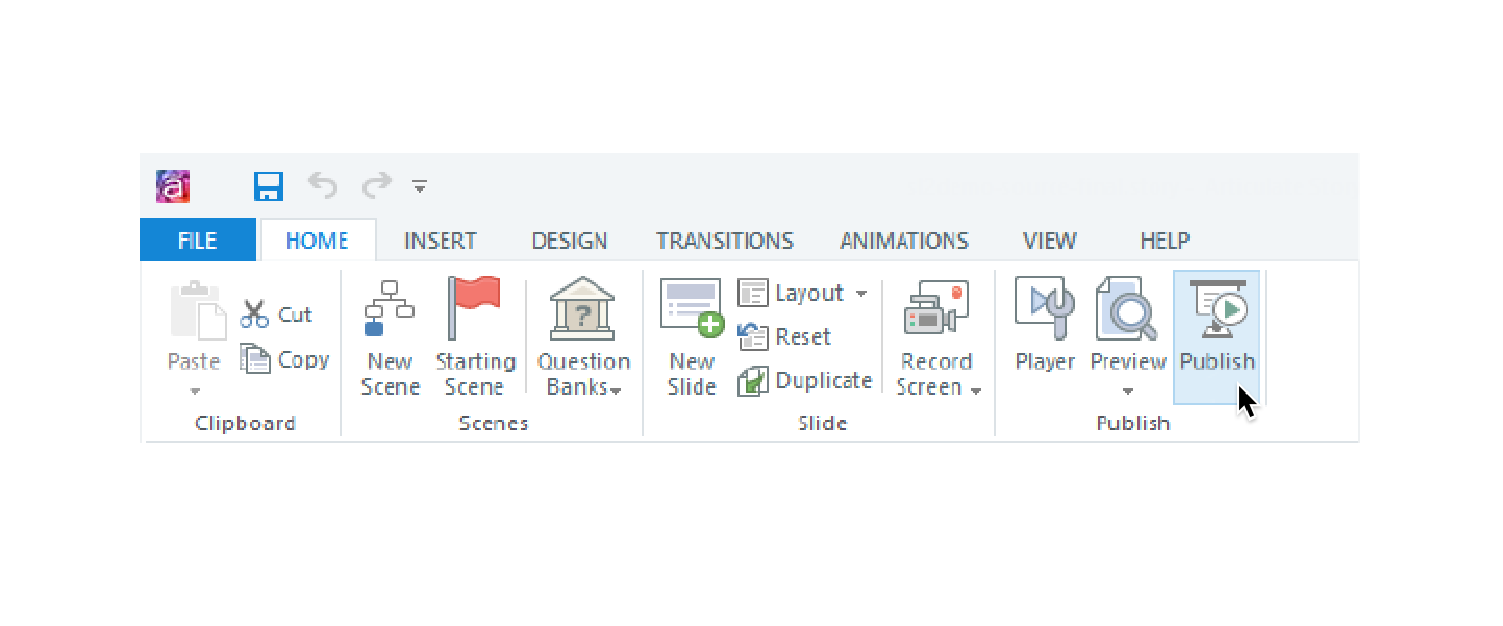 You’ll see various distribution options. We’re interested in producing SCORM to be uploaded to an LMS so choose the ‘LMS’ option. Input your course title, and download location for the zip folder – e.g. desktop. It’s important to note that this only affects the name of the file, not the course. (The description only comes into play if your learners are using the articulate mobile player.)
Step 2: Output options
Next up, choose your output options. Output choices basically decide the technologies that will be used to display your content in a browser. The main choice here is between HTML5 and flash. We’ve written in the past about the demise of flash and how that will affect your SCORM courses – in short: You should choose HTML5! Options to choose from:
- HTML5
- FLash
- Articulate mobile player*
You can then choose fallback options. So HTML5 will be used on new browsers and if your learners use a legacy browser it’ll fallback to flash. *A note about using the Articulate mobile player: It requires your learners to download an additional free app to view content. This adds yet another moving part to your training delivery – which is not ideal. If you do plan on using it, then use xAPI rather than SCORM. SCORM tracking isn’t supported in the articulate mobile player.
Step 4: Settings
The properties section allows you to adjust the player and the quality of the output. The ‘player’ is a frame that storyline places around your content. It contains navigation elements and menus. Changing the settings here simply adjusts how the course player will look. The other setting you might need to change is the ‘quality’. 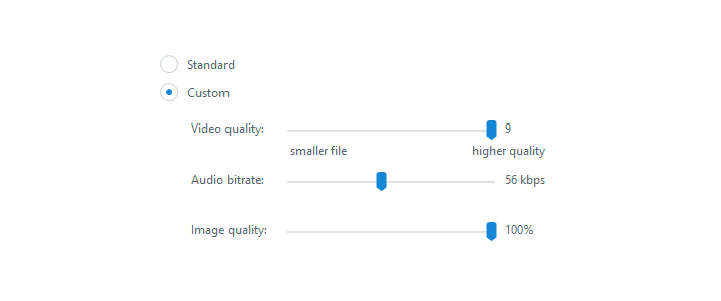 Why would you need to change these settings?
- Increase: You want the best possible visual and audio experience
- Reduce If your SCORM file is too large
- Reduce: If your learners are in poor network locations, reducing the quality will make them load quicker.
Note* It’s better to use the right type of images in the first place. Image Compression, resizing and video compression can lead to quality issues if you’re not familiar with them.
Step 5: Reporting and Tracking
When your SCORM course has been uploaded to your LMS, you’ll want to make sure that the two technologies know what’s expected from them. These two following options decide what information is being tracked and sent to the LMS. If these are not set up correctly your course won’t track properly.
Reporting
In the ‘LMS’ section choose SCORM 1.2. At the bottom, you’ll see LMS reporting options – which should you choose? It depends on the type of content contained in your course. We recommend either “Incomplete/complete” or “passed/failed”.
- Incomplete/Complete is best used for knowledge-based courses which do not contain any exam or assignment based content.
- Passed/Failed is best used with courses that do contain exam or assignment based content as the user can pass or fail this type of course rather than complete it and LearnUpon expects a score to be sent to it along with the “passed” or “failed” status.
Tracking
Click the “Tracking” tab to specify how you wish to track a learner’s progress. This determines when they have completed the SCORM course. You can choose whether it is tracked and marked completed, by “using the number of slides viewed”, or if your course contains a quiz, you can track it using the quiz result. Once you are happy that the “Tracking and Reporting Options” are configured correctly, click “OK” to exit the window and to return to the Publish window.
Step 6: Publish
Click the “Publish” button in the bottom right-hand corner of the screen to finish up. You’ll need to store your course as a zip file so that it can be uploaded to LearnUpon. To do this, just click on the “Zip” symbol, choose a location on your computer where you wish to save your file and click “Save”. Articulate have mentioned in the past you can run into problems by using USB devices or network storage to store your courses. Use your device’s local storage prior to uploading it to LearnUpon to avoid this!
Step 7: Upload to your LMS
The publishing process is done and you’re ready to upload your SCORM 1.2 course to your LMS. For LearnUpon users, all you have to do is add a SCORM module to a course and upload this SCORM zip folder. LearnUpon takes care of everything else!